
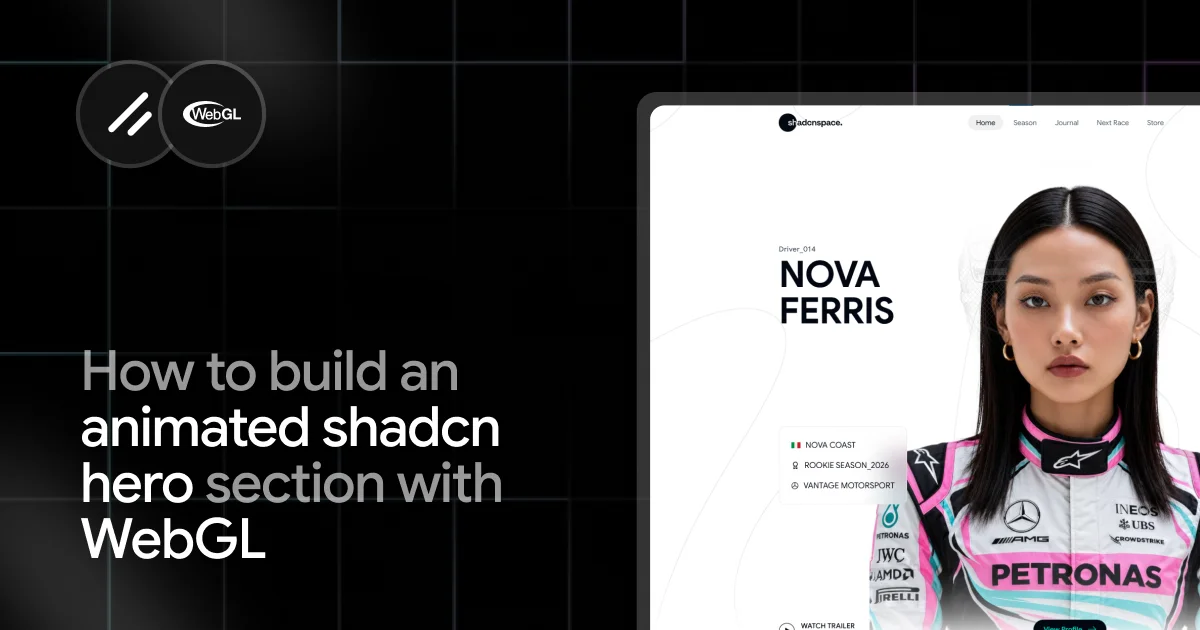
Short answer: To create an animated shadcn hero section with WebGL, put a full-screen <canvas> behind your shadcn UI, load a portrait and a depth map into Three.js, and use one fragment shader to shift the image with the cursor and reveal a second layer along the cursor trail. Keep the headline, stats, and buttons as real HTML on top. This post shows every step with code.
Most hero sections look pretty similar: a headline, a short description, a couple of buttons, and an image. They do the job, but they can also make a website feel familiar and forgettable. A static image doesn’t always give the page enough visual depth to stand out.
That’s where WebGL comes in. Instead of relying on a static image, you can create a hero that moves, reacts to the cursor, and adds depth to the page while still keeping important content like stats, events, and calls to action front and center.
In this post, we’ll build an interactive WebGL hero using shadcn/ui, Next.js, and Three.js, using the WebGL Hero block from Shadcn Space as our working example.
Who this is for: React and Next.js developers who are comfortable with components and hooks. You do not need prior GLSL experience, but basic Three.js knowledge helps.
The result: Turning a static hero into an interactive experience
A hero section can have a great layout and still feel static. The headline, buttons, image, and cards are all there, but nothing really responds to the visitor.
In this tutorial, we’ll take that familiar hero layout and add a WebGL layer that makes it feel more alive. The content will stay as regular shadcn/ui components, while WebGL handles the visual effects behind and around them.
Here’s what we’ll build:
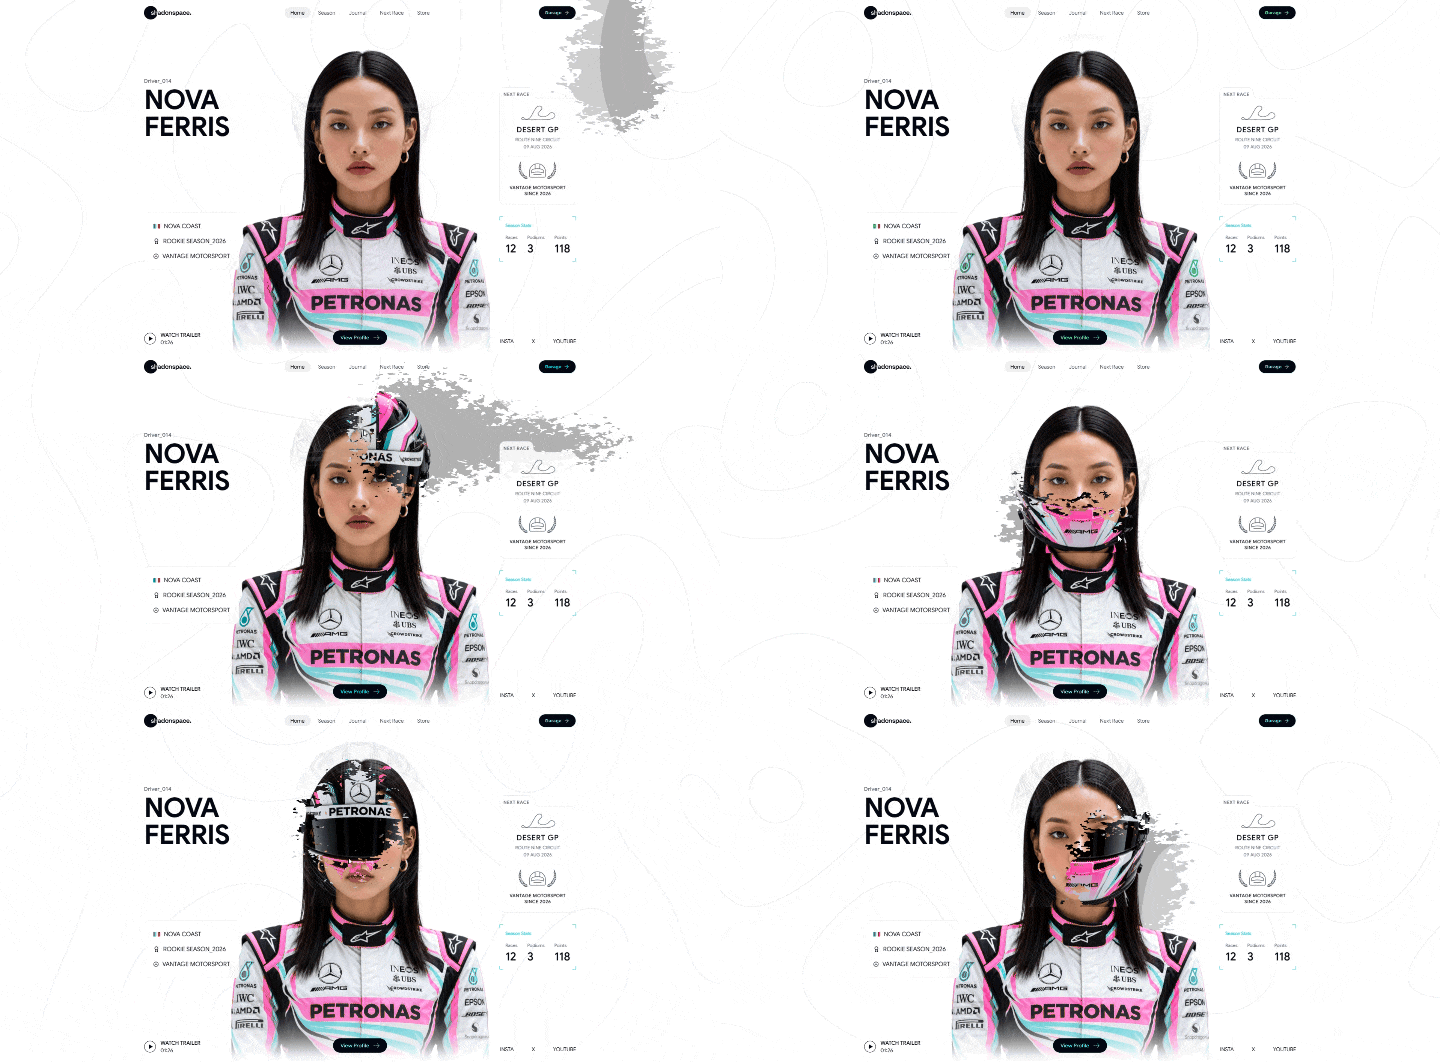
| Step | What we’ll add | What it changes |
| 1 | Animated background | Adds subtle movement instead of a static backdrop |
| 2 | Depth-based portrait | Makes a flat image feel layered and 3D |
| 3 | Cursor interaction | Makes the hero respond as the visitor moves the cursor |
| 4 | Dynamic lighting | Adds light and shadow that follow the cursor |
| 5 | Cursor reveal effect | Reveals another version of the image along the cursor path |
| 6 | Touch interaction | Keeps the effect working on devices without a cursor |
| 7 | Reduced-motion support | Keeps the experience comfortable for users who prefer less animation |
| 8 | WebGL fallback | Shows a static image when WebGL is unavailable |
The goal is not to replace your hero content with a canvas. Your headline, description, stats, buttons, and links will still be regular HTML and shadcn/ui components.
WebGL simply adds the interactive layer that makes the hero feel less static.
By the end, you’ll have a hero that starts as a familiar UI layout and becomes more dynamic as visitors interact with it.
What you will learn
- Why a WebGL hero beats a static one
- How to layer a canvas behind shadcn/ui components
- How depth map parallax works in a fragment shader
- How to light a flat portrait from the cursor position
- How a cursor trail becomes a reveal mask
- How to draw an animated background with no image
- How to keep it fast, accessible, and safe when WebGL is missing
Why a WebGL hero beats a static one?
A static hero image shows what a brand looks like, while a WebGL hero can show how it behaves. Subtle motion, cursor interaction, and depth can capture attention without adding more copy. Techniques like depth mapping can also give a simple image a 3D feel without requiring a full 3D model.
With WebGL, you can create effects such as:
- Per-pixel depth, making a flat image shift and feel more like a 3D object
- Cursor-driven lighting and movement, making the visual respond to the visitor
- Masks and image reveals, revealing different parts of an image as the cursor moves
- Procedural backgrounds, creating dynamic visuals without relying on large image assets
This also gives the surrounding layout more room to carry useful information such as stats, events, and CTAs. The trade-off is added complexity, including bundle size, GPU usage, device limitations, and reduced-motion support, which we’ll cover throughout this post.
Hero architecture: the three-layer model
Think of the hero as three stacked layers, drawn in one shader pass.
Layer 3  Reveal plate     second image, visible only under the cursor trail
Layer 2  Subject          portrait with depth parallax and relighting
Layer 1  Background       procedural contour lines
-----------------------------------------------------------------
DOM      shadcn UI        headline, cards, buttons (real HTML, on top)
The JavaScript side stays small. It loads textures, smooths the pointer, keeps a short history of pointer positions (the trail), and sends it all to the shader as uniforms.
pointer -> smoothing -> trail buffer -> uniforms -> fragment shader -> pixelsOne rule keeps it maintainable: the scene class knows nothing about React, and the component knows nothing about Three.js. One hook connects them.
Suggested file layout:
src/components/webgl-hero/
  hero.tsx            # JSX: canvas + shadcn UI
  use-hero-scene.ts   # hook: lifecycle, resize, pointer, render loop
  hero-scene.ts       # HeroScene class: Three.js, uniforms, per-frame update
  shaders.ts          # GLSL strings
Prepare your assets
You need a few images of the same subject, exported at the same pixel size.
| Asset | What it is | Notes |
| diffuse.png | Subject with transparent background | PNG or WebP with alpha |
| depth.png | Grayscale depth map | White is near, black is far. Do not blur |
| normal.png | Normal map (optional) | Gives cleaner lighting than values derived from depth |
| plate.png | Second layer shown by the cursor | Alternate version of the subject (illustrated, x-ray, recolored) with alpha |
To get a depth map, run the portrait through a monocular depth-estimation model such as Depth Anything and export 8-bit grayscale. The nearest part of the subject should be the brightest. Normal maps can be generated from the same image with most 3D or texture tools.
Resize to about 1100 px wide and keep each file under a few hundred KB.
Install the dependencies:
npm install three motion
npm install -D @types/three
npx shadcn@latest add button card
Technical implementation and code demos
The snippets below cover the parts you can reuse in any WebGL page: canvas layering, renderer setup, texture loading, uniforms, a trail buffer, shader tricks, and a safe render loop.
Eight demos, each solving one problem.
1: Layer a canvas behind your UI
The canvas sits absolutely positioned under normal content. Your shadcn components sit above it.
<section ref={heroRef} className="relative isolate flex min-h-screen flex-col overflow-clip">
<div ref={sceneWrapRef} className="absolute inset-0 z-0 pointer-events-none transform-gpu">
<canvas ref={canvasRef} aria-hidden="true" className="block h-full w-full" />
</div>
{noWebgl && (
<img src="/hero/fallback.png" alt="" aria-hidden="true"
className="absolute bottom-0 left-1/2 h-full w-auto -translate-x-1/2 object-contain" />
)}
<div className="relative z-20 mx-auto w-full max-w-7xl px-4 lg:px-8">
<h1>Your headline</h1>
{/* shadcn Card, Button, Dialog... */}
</div>
</section>What to notice
- pointer-events-none keeps buttons and links clickable.
- aria-hidden=”true” marks the canvas as decoration.
- The h1 is real HTML, not WebGL.
- A static <img> fallback is ready when WebGL is not available.
Use it for: any WebGL background, product viewer, or interactive banner.
Trade-off: the canvas is invisible to search engines and screen readers. That is why content stays in the DOM.
2: Create the renderer and pick a quality tier
Before drawing anything, decide how much work this device can handle. This is the most important WebGL habit.
const getSceneTier = () => {
const coarse = window.matchMedia("(hover: none) and (pointer: coarse)").matches;
const reducedMotion = window.matchMedia("(prefers-reduced-motion: reduce)").matches;
const width = window.innerWidth;
const name = width < 768 ? "mobile" : coarse || width < 1280 ? "tablet" : "desktop";
return {
name,
maxDpr: name === "mobile" ? 1 : name === "tablet" ? 1.25 : 1.5,
antialias: name === "desktop",
trailSamples: name === "mobile" ? 28 : name === "tablet" ? 44 : 72,
pointerEnabled: !coarse && !reducedMotion,
freeze: reducedMotion,
};
};const tier = getSceneTier();
const renderer = new THREE.WebGLRenderer({
canvas,
alpha: false,
antialias: tier.antialias,
stencil: false,
powerPreference: tier.name === "mobile" ? "default" : "high-performance",
});
renderer.setPixelRatio(Math.min(window.devicePixelRatio, tier.maxDpr));
renderer.outputColorSpace = THREE.SRGBColorSpace;What to notice
- Capping the pixel ratio is the cheapest performance win in any WebGL page. A 3x phone screen renders nine times the pixels otherwise.
- alpha: false and stencil: false skip buffers you do not use.
- outputColorSpace = SRGBColorSpace makes colors match your CSS.
Use it for: every Three.js project.
Trade-off: tiers are a guess from screen width and input type. They are not a real benchmark, so keep the lowest tier safe.
3: Load textures with the right color space
Textures that hold color are sRGB. Textures that hold data (depth, normals, noise) are not. Mixing them up is the most common reason parallax and lighting look wrong.
const loader = new THREE.TextureLoader();
const loadTexture = (url: string, srgb = false) =>
new Promise<THREE.Texture>((resolve, reject) => {
loader.load(
url,
(texture) => {
if (srgb) texture.colorSpace = THREE.SRGBColorSpace;
texture.minFilter = THREE.LinearMipmapLinearFilter;
texture.magFilter = THREE.LinearFilter;
texture.generateMipmaps = true;
resolve(texture);
},
undefined,
reject,
);
});
const [diffuse, depth, normal, plate] = await Promise.all([
loadTexture("/hero/diffuse.png", true),
loadTexture("/hero/depth.png"),
loadTexture("/hero/normal.png"),
loadTexture("/hero/plate.png", true),
]);Then upload and compile before the first visible frame, so the scene does not stutter on load:
for (const texture of [diffuse, depth, normal, plate]) renderer.initTexture(texture);
await renderer.compileAsync(scene, camera);
renderer.render(scene, camera);
What to notice
- Promise.all loads every texture in parallel.
- Only color textures get SRGBColorSpace.
- initTexture and compileAsync move the cost of GPU upload and shader compile before the user sees anything.
Use it for: any texture-driven effect, such as displacement, masks, and image transitions.
Trade-off: all textures must load before the scene shows. Keep a loading state or a static fallback visible meanwhile.
4: Send values to the shader every frame
A ShaderMaterial takes uniforms: values you set from JavaScript and read in GLSL. Smooth the pointer before sending it, so motion feels weighted instead of twitchy.
const material = new THREE.ShaderMaterial({
  vertexShader,
  fragmentShader,
  uniforms: {
    uDiffuse: { value: diffuse },
    uDepth: { value: depth },
    uNormal: { value: normal },
    uParallax: { value: new THREE.Vector2(0, 0) },
    uDepthScale: { value: 0.03 },
  },
  transparent: true,
  depthWrite: false,
});
scene.add(new THREE.Mesh(new THREE.PlaneGeometry(width, height), material));
// every frame
smoothed.x += (pointer.x - smoothed.x) * pointerLerp;
smoothed.y += (pointer.y - smoothed.y) * pointerLerp;
material.uniforms.uParallax.value.set(smoothed.x, -smoothed.y);
renderer.render(scene, camera);The pointer itself comes from one passive listener, normalized to -1 to 1:
window.addEventListener(
  "pointermove",
  (e) => setPointer((e.clientX / window.innerWidth) * 2 - 1, (e.clientY / window.innerHeight) * 2 - 1),
  { passive: true },
);
What to notice
- lerp (current += (target – current) * factor) is one line and removes most jitter.
- depthWrite: false with transparent: true is the usual setup for layered 2D planes.
- Never feed raw pointer values into a shader.
Use it for: any interactive shader, such as hover distortion, mouse-driven gradients, and image warps.
Trade-off: a lower pointerLerp feels smoother but lags behind the cursor. Start around 0.08 and tune.
5: Depth map parallax and relighting
This is the effect that makes a flat photo feel 3D. The fragment shader reads a grayscale depth map and uses it to shift where the photo is sampled. Near pixels move more than far ones.
varying vec2 vUvP;
uniform sampler2D uDiffuse;
uniform sampler2D uDepth;
uniform sampler2D uNormal;
uniform vec2 uParallax;
uniform float uDepthScale;
void main() {
float depth = texture2D(uDepth, vUvP).r;
vec2 offset = uParallax * (depth - 0.5) * uDepthScale;
vec2 uv = vUvP + offset;
vec4 color = texture2D(uDiffuse, uv);
vec3 normal = normalize(texture2D(uNormal, uv).rgb * 2.0 - 1.0);
vec3 lightDir = normalize(vec3(uParallax * 1.6, 1.0));
float lambert = max(dot(normal, lightDir), 0.0) - 0.72;
vec3 lit = color.rgb * (1.0 + lambert * 1.2);
gl_FragColor = vec4(clamp(lit, 0.0, 1.0), color.a);
#include <colorspace_fragment>
}How to read it
- Depth is 0 to 1. Subtracting 0.5 centers it, so near pixels shift one way and far pixels the other.
- uParallax is the smoothed pointer; uDepthScale sets strength. Use 0.02 to 0.04.
- The normal map is decoded from 0..1 to -1..1, then compared to a light direction that follows the pointer.
- Lambert is a basic diffuse term. The – 0.72 offset makes it a soft highlight instead of a heavy shadow.
- #include <colorspace_fragment> converts the output to the renderer’s color space.
If you do not have a normal map, estimate the surface direction from how fast depth changes between neighbouring pixels:
vec2 texel = 1.0 / uImageSize;
float dx = texture2D(uDepth, uv + vec2(texel.x, 0.0)).r - texture2D(uDepth, uv - vec2(texel.x, 0.0)).r;
float dy = texture2D(uDepth, uv + vec2(0.0, texel.y)).r - texture2D(uDepth, uv - vec2(0.0, texel.y)).r;
vec3 normal = normalize(vec3(-dx * 8.0, -dy * 8.0, 1.0));
Use it for: product shots, portraits, cards, and posters that need depth without a 3D model.
Trade-off: large uDepthScale values tear the silhouette. Tune per image.
7: Draw an animated background with no image
A procedural background costs zero bytes of download. Sum a few sine waves, multiply, and take fract to get repeating bands.
float backdropField(vec2 p, float t) {
float f = sin(p.x * 1.00 + t * 0.60) * 0.50;
f += sin(p.y * 0.85 - t * 0.45) * 0.45;
f += sin((p.x + p.y) * 0.65 + t * 0.35) * 0.35;
f += sin((p.x - p.y) * 0.95 - t * 0.55) * 0.25;
return f * 0.5 + 0.5;
}
void main() {
vec2 ndc = vClip.xy / vClip.w;
vec2 p = vec2(ndc.x * uAspect, ndc.y) * uLineScale;
float t = uTime * uWaveSpeed;
float scaled = backdropField(p, t) * uLineCount;
float w = max(fwidth(scaled) * uLineThickness, 1e-5);
float line = 1.0 - smoothstep(0.0, w, abs(fract(scaled) - 0.5));
vec3 color = mix(uBackground, uLineColor, line * uLineOpacity);
gl_FragColor = vec4(color, 1.0);
#include <colorspace_fragment>
}To get vClip, the vertex shader passes the clip-space position along. This gives every plane a screen-space coordinate (NDC), no matter how the camera or mesh is placed:
varying vec2 vUvP;
varying vec4 vClip;
void main() {
  vUvP = uv;
  vec4 clip = projectionMatrix * modelViewMatrix * vec4(position, 1.0);
  vClip = clip;
  gl_Position = clip;
}
What to notice
- fract(scaled) repeats a 0..1 ramp. Distance from 0.5 makes it a thin line.
- fwidth measures how fast scaled changes per pixel. Using it as line width keeps lines crisp at any pixel ratio.
- Increase uTime over time and the whole field flows.
Use it for: animated gradients, topographic lines, grids, and noise backgrounds.
Trade-off: procedural lines trade bandwidth for GPU time. Fine on desktop, keep it simple on phones.
8: A render loop that knows when to stop
An always-on requestAnimationFrame loop wastes battery. Pause it whenever nobody can see the result, and clean up on unmount.
const probe = document.createElement("canvas");
if (!(probe.getContext("webgl2") || probe.getContext("webgl"))) {
setNoWebgl(true);
return;
}
let inView = true;
const intersectionObserver = new IntersectionObserver(([entry]) => {
inView = entry.isIntersecting;
});
intersectionObserver.observe(hero);
const resizeObserver = new ResizeObserver(() => scene.resize(wrap.clientWidth, wrap.clientHeight));
resizeObserver.observe(wrap);
const tick = (time: number) => {
rafId = requestAnimationFrame(tick);
if (!inView) return;
if (document.hidden) return;
if (window.scrollY > window.innerHeight * 1.15) return;
if (time - lastUpdate < tier.frameInterval) return;
lastUpdate = time;
scene.update(time);
};
rafId = requestAnimationFrame(tick);
return () => {
cancelAnimationFrame(rafId);
resizeObserver.disconnect();
intersectionObserver.disconnect();
scene.dispose();
};And dispose() frees everything the GPU holds:
dispose() {
  scene.traverse((object) => {
    const mesh = object as THREE.Mesh;
    mesh.geometry?.dispose();
    const materials = Array.isArray(mesh.material) ? mesh.material : [mesh.material];
    for (const material of materials) {
      const shader = material as THREE.ShaderMaterial;
      for (const value of Object.values(shader.uniforms || {})) {
        const texture = value?.value as THREE.Texture | undefined;
        if (texture?.isTexture) texture.dispose();
      }
      material.dispose();
    }
  });
  renderer.dispose();
}
What to notice
- Skip frames when the hero is off-screen, the tab is hidden, or the user has scrolled well past.
- frameInterval lets tablets and phones cap at about 60 fps.
- Without dispose(), every hot reload and route change leaks GPU memory.
Use it for: every WebGL component in a React app.
Trade-off: more conditions mean more states to test. Keep them in one tick function so they are easy to read.
Animate the DOM content too
Use motion springs so text and cards arrive with the scene:
import { motion } from "motion/react";
<motion.div
initial={{ opacity: 0, y: "1.25rem" }}
animate={entranceActive ? { opacity: 1, y: "0rem" } : undefined}
transition={{ type: "spring", stiffness: 90, damping: 26, delay: 0.9 }}
>
{/* stats card, event card, CTA row */}
</motion.div>Flip entranceActive once the scene reports it is ready. The canvas and the DOM then start as one sequence.
Performance: the do and don’t checklist
| Concern | Do | Don’t |
| Pixel ratio | Cap at 1 on mobile and 1.5 on desktop | Render at the full device pixel ratio |
| Textures | Resize to around 1100px and keep them under a few hundred KB | Ship large 4K PNGs |
| Shader loops | Reduce trail samples on weaker devices | Run 72 samples on every phone |
| Render loop | Pause when hidden, off-screen, or scrolled past | Keep rendering when nobody can see it |
| Objects | Reuse vectors inside the render loop | Create new objects every frame |
| Antialiasing | Turn it off on mobile when needed | Leave it enabled by default |
| Motion | Respect prefers-reduced-motion | Ignore the user’s motion preferences |
| Cleanup | Call dispose() when the component unmounts | Rely only on garbage collection |
| Fallback | Show a static image when WebGL is unavailable | Leave the hero blank |
Quality tiers that work well:
| Tier | Pixel ratio cap | Trail samples | Antialias |
| Mobile | 1 | 28 | Off |
| Tablet | 1.25 | 44 | Off |
| Desktop | 1.5 | 48 to 72 | Off or on |
Keep the scope small. A few images and one shader are enough for a strong hero.
Accessibility and SEO for WebGL heroes
- Keep content in the DOM: The h1, stats, and links must be HTML. Canvas content is invisible to crawlers and screen readers.
- Mark the canvas with aria-hidden=”true”. It is decoration.
- Respect reduced motion: Check prefers-reduced-motion: reduce, skip pointer tracking, and draw one still frame.
- Respect data saver: navigator.connection.saveData and navigator.deviceMemory let you freeze the scene on constrained devices.
- Check contrast: Text over the canvas must still pass 4.5:1.
- Do not trap focus: The canvas is pointer-events-none, so tab order and clicks go to the UI.
- Protect LCP: Lazy-load the WebGL layer after the DOM content has painted, and keep a static fallback image sized to avoid layout shift.
Production trade-offs
- Bundle weight: Three.js adds roughly the cost of a small library. Import only what you use, and load the hero client-side only.
- GPU cost: A per-pixel loop is fine on desktop and risky on old phones. Tier it.
- Maintenance: Shaders are strings. Keep them in one file with named uniforms and short comments.
- Asset pipeline: Every new subject needs a portrait, a depth map, and a plate. Budget time for that.
When to use a WebGL hero, and when not to
Use it when:
- The hero is a product, a person, or a brand moment worth exploring
- You have strong visual assets
- The audience is on desktop or recent phones
- You can afford one extra design and asset pass
Do not use it when:
- The page is a dense documentation or pricing page
- Core Web Vitals are already tight
- You have no budget for fallbacks and testing
- The message needs to be read in two seconds with no distraction
Common mistakes
Here are some common mistakes to avoid when building a WebGL hero:
- Marking data textures as sRGB
Depth maps should stay in linear color space. - Skipping dispose()
Make sure to clean up WebGL resources when the component unmounts. Otherwise, GPU memory can leak. - Using raw pointer values
Smooth pointer movement with lerp before using the values in your animation. - Rendering at the full device pixel ratio
Limit the pixel ratio to reduce unnecessary GPU work. - Running the animation while the page is hidden
Pause the render loop when document.hidden is true or when the hero is off-screen. - Putting the headline inside the canvas
Keep important text in HTML so it remains accessible and SEO-friendly. - Forgetting a fallback
Show a static image when WebGL is unavailable or cannot run. - Using too much depth
A large depth scale can distort or tear the subject’s silhouette. Adjust the depth value for each asset. - Using smoothstep edges incorrectly
When the effect needs the opposite direction, use 1.0 – smoothstep(low, high, x). - Creating new objects every frame
Reuse vectors and other objects inside the render loop instead of creating new ones on every frame. - Compiling shaders on the first visible frame
Prepare textures with initTexture and compile shaders ahead of time with compileAsync to avoid a visible delay when the hero first appears.
Explore Ready-to-Use Animated Shadcn Blocks

Need animated UI sections without building every interaction from scratch? Explore a growing collection of animated Shadcn blocks for hero, feature, integration, login, newsletter, and other website sections. Each block comes with a ready-to-use prompt feature that lets you bring the design and motion direction into your preferred AI workflow.
FAQ
1. What is a WebGL hero section?
A hero section whose main visual is drawn on a <canvas> with WebGL, usually through Three.js. It allows effects CSS cannot do, such as per-pixel depth parallax and shader-based reveals.
2. How do I create a depth map for my image?
Run the image through a monocular depth-estimation model and export 8-bit grayscale. White should be the nearest area. Keep it the same pixel size as the portrait and do not blur it.
3. Does a WebGL hero hurt SEO or page speed?
Not if the text stays in the DOM and the canvas loads after the first paint. Cap the pixel ratio, keep textures small, and lazy-load the scene.
4. How do I make a WebGL hero fast on mobile?
Cap the pixel ratio at 1, lower the trail sample count, turn off antialiasing, and pause rendering when the hero is not visible.
Conclusion
A WebGL hero is more than a canvas behind your UI. It combines interactive visuals, thoughtful layering, and real HTML content to create an experience that feels dynamic without sacrificing usability.
Keep the WebGL scene separate from React, manage its lifecycle through a dedicated hook, and adjust visual quality based on the device. Most importantly, keep the effect as the stage, not the script. Your headline, stats, and CTAs should always remain clear and accessible.
This is the approach we used to build the production-ready WebGL Hero at Shadcn Space, combining a procedural background, depth-mapped portrait, cursor reveal, responsive quality settings, and touch-friendly interactions.
The result is a hero that is visually engaging while still keeping useful product information one glance away.
If you prefer starting with a finished implementation, you can explore the WebGL Hero block.
