Most e-commerce projects are not made difficult by backend logic. The real challenge is frontend development at scale.
Developers repeatedly build the same things:
- navigation menus
- hero sections
- product grids
- category filters
- product detail pages
- authentication screens
- testimonials and FAQ sections
Even with a good component library, creating a polished storefront still takes significant time.
This project started with a simple question:
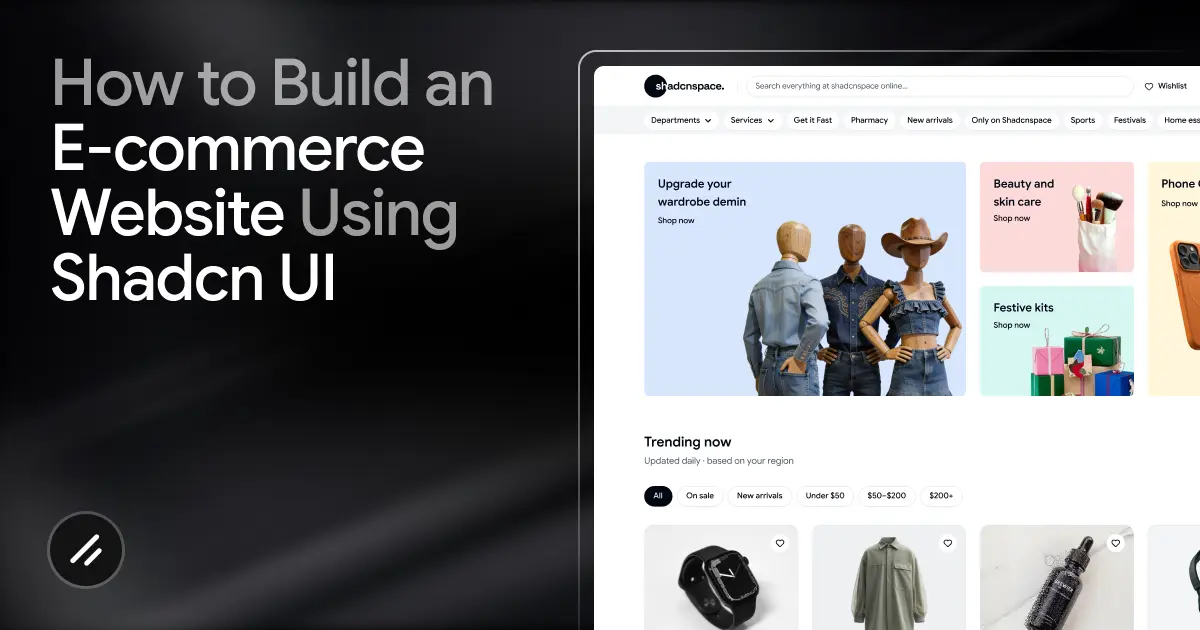
Can we build a complete modern e-commerce website faster using Shadcn UI, reusable Shadcn ecommerce blocks, and AI-assisted development?
The answer was yes.
Using Shadcn UI, MCP (Model Context Protocol), and Antigravity + Gemini Pro, we built a premium storefront with centralized product data, dynamic category filtering, reusable UI sections, and AI-assisted implementation without starting from scratch. The project itself used a Next.js-based stack with Tailwind CSS, Framer Motion, and reusable Shadcn-based storefront blocks to accelerate development.
One important part of the workflow was using Shadcn Space, which provides prebuilt blocks built on top of Shadcn UI. Instead of manually designing every storefront section, we could use production-ready blocks for categories, product listings, authentication, testimonials, and layouts, then customize them for the project. The original implementation used multiple Shadcn Space blocks across navigation, products, marketing, social proof, and authentication flows.
By the end of this workflow, we had a fully functional e-commerce storefront with:
- a custom homepage
- dynamic product listing pages
- product detail pages
- category-based filtering
- authentication pages
- testimonials and FAQ sections
- responsive layouts and animations
In this blog, you will learn:
- How was the complete e-commerce workflow structured?
- How has MCP improved AI-assisted development?
- How reusable Shadcn-based blocks speed up storefront creation?
- How were product data and category filtering handled?
- How did AI assist with implementation and assets?
- How to apply the same workflow to your own e-commerce projects?
By the end, you will understand how to build scalable e-commerce frontends using Shadcn UI and a modern block-based workflow instead of manually building every page from scratch.
Why This Workflow Works
Most e-commerce websites follow the same frontend structure. You usually end up building the same sections again and again: navigation, hero sections, product grids, collections, filters, product pages, authentication screens, FAQs, and testimonials.
The problem is that even with a good component library, rebuilding these layouts for every project still takes a lot of time.
This workflow solved that by using Shadcn UI as the foundation and combining it with reusable storefront blocks. Instead of creating every section from scratch, we started with prebuilt structures for products, categories, testimonials, authentication, and layouts, then customized them around the brand and product data. The original implementation reused multiple storefront blocks across the entire website.
That changed the development process completely. Instead of spending most of the time building repetitive UI, we could focus more on product structure, routing, filtering, data flow, and overall user experience.
Another major advantage was consistency. Since every section was built on top of the same Shadcn-based component system, the spacing, styling, and interaction patterns stayed aligned throughout the storefront.
The workflow became even faster with MCP integration. Rather than manually searching documentation or component libraries, the AI assistant could directly discover and install the required storefront blocks from the registry itself.
For developers, this workflow feels less like manually building pages and more like assembling scalable storefront systems that can be customized and extended much faster.
Tech Stack Used in the Project
The storefront was built using a modern React and Next.js stack focused on reusable UI, fast development, and scalable frontend architecture.
Next.js Pages Router
The project used Next.js Pages Router for routing and page structure.
It helped organize the storefront into separate pages for:
- homepage
- shop page
- product detail pages
- authentication pages
- contact and informational pages
This structure kept routing simple and worked well for dynamic product pages and category-based navigation.
Tailwind CSS
All styling was handled with Tailwind CSS. Since the storefront relied heavily on reusable blocks and components, utility-first styling made customization much faster without maintaining large CSS files.
Shadcn UI
Shadcn UI was used as the main component foundation for the entire project.
Instead of using a fixed design framework, Shadcn UI provides reusable and editable Shadcn components directly inside the codebase. This made it easier to maintain consistency across:
Shadcn-Based Storefront Blocks
To speed up development, the project also used reusable storefront blocks built on top of Shadcn UI. The original implementation included blocks for:
- navigation
- hero sections
- product categories
- product listings
- testimonials
- FAQs
- authentication
- footers
- contact sections
These blocks helped reduce repetitive frontend work and made the storefront faster to assemble.
Framer Motion
Framer Motion was used for animations and UI interactions.
Most animations were kept lightweight and focused on:
- hover states
- transitions
- product interactions
- smoother visual feedback
This helped the storefront feel polished without overcomplicating the UI.
MCP (Model Context Protocol)
One of the most useful parts of the workflow was Shadcn MCP.
The project connected the AI assistant to the storefront block registry through the Shadcn Space MCP server. This allowed the AI to discover components, retrieve installation commands, and integrate blocks directly into the project workflow.
Antigravity + Gemini Pro
For this project, we used Antigravity + Gemini Pro as AI-assisted development tools during the workflow.
The AI helped with tasks like:
- block integration
- asset generation
- product data mapping
- routing logic
- UI customization
- interactive frontend behavior
Instead of replacing development, the AI mainly automated repetitive implementation tasks, so the focus could stay on building the actual storefront experience.
You can follow the same workflow using other editors and AI coding tools as well. For example:
- VS Code
- Cursor
- Claude
- GitHub Copilot
- Windsurf
- other AI agents and coding assistants
In this blog, we are specifically using Antigravity + Gemini Pro because that was the workflow used while building the storefront.
Understanding Shadcn UI vs Shadcn Space
A lot of developers confuse Shadcn UI and Shadcn Space, but they solve different problems.
What Shadcn UI Provides
Shadcn UI was used as the main component foundation for the storefront.
Unlike traditional UI libraries, Shadcn UI adds components directly into your project instead of locking them inside a package. This makes customization much easier and gives developers full control over the codebase.
For this project, Shadcn UI handled the reusable design system across the storefront, including components like buttons, forms, cards, dialogs, and layouts.
Since everything followed the same component structure, maintaining consistent spacing, styling, and interactions across the website became much easier.
What Shadcn Space Adds
Shadcn Space builds on top of Shadcn UI by providing larger prebuilt sections and storefront blocks.
Instead of only giving small UI primitives, it provides ready-made sections like:
- navigation bars
- hero sections
- product categories
- product listings
- testimonials
- FAQs
- authentication pages
- footers
This helped speed up development significantly because the project already had structured storefront patterns ready to customize.
Rather than spending time building layouts from scratch, we could focus more on product data, routing, filtering, and overall user experience.
Why This Combination Works Well for E-commerce
E-commerce projects usually repeat the same layout patterns across different stores.
Using Shadcn UI alone still means building larger sections yourself. Using Shadcn-based storefront blocks on top of it removes a large amount of repetitive frontend work.
For this project, the workflow looked like this:
- Shadcn UI handled the reusable component system
- Storefront blocks handled larger page sections
- Custom code handled business logic and product behavior
That balance made the storefront easier to customize while still keeping development fast.
The Biggest Advantage
The biggest benefit was flexibility.
Since everything was still built on top of Shadcn UI, the blocks were not treated like locked templates. Every section could still be edited, extended, or completely redesigned when needed.
That makes this workflow very different from traditional drag-and-drop e-commerce builders, where customization usually becomes difficult once the project grows.
How MCP Improved the Development Workflow
One of the most interesting parts of this project was using MCP (Model Context Protocol) during development.
Normally, when working with component libraries, developers manually search documentation, browse registries, copy installation commands, and then customize the components themselves.
With MCP, that workflow became much faster.
The project connected the AI assistant directly to the Shadcn Space registry through its MCP server. This allowed the AI to discover available storefront blocks, retrieve the correct installation commands, and integrate them into the project workflow automatically.
For example, if we needed a product category section, the AI could:
- search the registry
- Find the relevant storefront block.
- Install it into the project
- replace placeholder content
- connect it with the actual product data
instead of requiring everything to be done manually.
This made AI-assisted development much more practical because the assistant was working with real project context instead of guessing component structures from prompts alone.
How Antigravity + Gemini Pro Helped Build the Store
After the storefront structure was ready, Antigravity + Gemini Pro were used to speed up implementation and repetitive development tasks.
Instead of only generating small code snippets, the AI helped with larger parts of the workflow, like:
- integrating storefront blocks
- organizing product data
- wiring, routing, and filters
- generating assets
- customizing UI sections
- handling interactive frontend behavior
One useful example was category-based navigation. The project used useSearchParams so clicking a category section on the homepage could automatically filter products on the shop page. The original implementation specifically used this flow to connect category cards with filtered storefront navigation.
The AI also helped centralize product information into a shared data layer, making it easier to reuse products across listings, collections, and product detail pages.
Rather than replacing development, the AI mainly reduced repetitive implementation work, so the focus could stay on architecture, customization, and user experience.
Project Structure and Data Architecture
Keeping the project structure organized was important because the storefront included multiple pages, reusable UI blocks, animations, filters, authentication flows, and shared product data.
The project was structured around reusable components and modular storefront sections instead of keeping everything inside page files.
A simplified version of the structure looked like this:
ecommerce-website/
├── app/
│   ├── (site)/
│   ├── checkout/
│   ├── login/
│   ├── register/
│   ├── layout.tsx
│   └── globals.css
│
├── components/
│   ├── shadcn-space/
│   ├── animations/
│   ├── blocks/
│   └── ui/
│
├── hooks/
├── lib/
├── public/
├── assets/
The app/ directory handled the main routes for the storefront, including checkout and authentication pages.
The components/ directory were separated into reusable sections:
- ui/ for Shadcn UI components
- blocks/ for larger storefront sections
- animations/ for interactive effects
- shadcn-space/ for integrated storefront blocks
The project also kept reusable logic and product-related utilities inside the lib/ directory, which helped separate the data layer from the UI layer.
This structure made it easier to:
- reuse storefront sections
- scale the project cleanly
- maintain consistent UI patterns
- Organize AI-generated code properly
- avoid large monolithic page files
As the storefront grew, keeping the architecture modular became much more important than simply adding more components quickly.
Step-by-Step: Building the E-commerce Website
After setting up the project structure, the next step was building the storefront section by section using reusable Shadcn blocks and centralized product data.
1. Setting Up the Next.js Project
The project was initialized using the Shadcn UI preset setup command instead of manually configuring everything from scratch.
npx shadcn@latest init --preset b0 --base base --template nextThis helped bootstrap the project with:
- Next.js setup
- Tailwind CSS configuration
- base Shadcn UI structure
- Predefined project configuration
Using this setup made the initial project structure much faster to configure and reduced the amount of manual setup required before starting the storefront development.
2. Configuring Shadcn Space with the CLI
In this section, you explain:
- Adding the registry in components.json
- How the Shadcn CLI can install blocks
- Basic installation commands
Example:
{
"registries": {
  "@shadcn-space": "https://.shadcn.space/r/{name}.json"
}
}
For more information, check our documentation on how to use the shadcn CLI.
3. Adding the MCP Server to Your Editor
To use Shadcn Space directly inside your editor, you need to configure its MCP server.
Once connected, your AI assistant can search, discover, and install storefront blocks directly from the registry without manually browsing the website.
Quick Install
The easiest setup method is using the Shadcn Space CLI:
npx shadcnspace-cli install <client>Replace <client> with your editor.
Example:
npx shadcnspace-cli install cursor
npx shadcnspace-cli install antigravity
npx shadcnspace-cli install windsurf
After setup, the editor can directly access Shadcn Space components and storefront blocks during development.
For more information, check our documentation on the Shadcn MCP Server.
4. Using Antigravity + Gemini Pro + MCP to Find and Install Blocks
Once the MCP server was connected, the workflow became much faster.
Instead of manually browsing component libraries, we used Antigravity + Gemini Pro to discover and install storefront blocks directly inside the editor.
For example, if we needed a category section for the homepage, we could simply prompt the AI:
Find a modern product category block for an ecommerce homepage using Shadcn SpaceThe workflow then looked like this:
- The AI searches the Shadcn Space registry through MCP
- Finds relevant storefront blocks
- Retrieves the correct installation command
- Installs the selected block
- Adds it directly into the project
5. Creating the Product Data Layer
After setting up the storefront blocks, the next step was creating a centralized product data layer.
Instead of hardcoding product information inside components, all products were stored inside a shared data.ts file and reused across the storefront. The original implementation also centralized inventory into a single shared data structure connected to the storefront blocks dynamically.
Example:
// lib/data.ts

export const products = [
{
  id: "1",
  name: "Minimal Linen Shirt",
  category: "Shirts",
  price: 48,
  slug: "minimal-linen-shirt",
  image: "/products/shirt-1.jpg",
},
]
This made product listings, category filtering, and dynamic product pages much easier to manage throughout the project.
6. Building the Homepage
After setting up the product data layer, we started building the homepage using AI-assisted block generation.
Instead of manually selecting and integrating every section, we prompted the AI agent to create the homepage using Shadcn Space blocks.
Example prompt:
Create a modern ecommerce homepage using Shadcn Space blocks.Using MCP, the AI searched the Shadcn Space registry, selected relevant storefront blocks, installed them into the project, and integrated them with the existing layout and product data automatically.
The workflow included:
- finding matching homepage blocks
- installing the required sections
- replacing placeholder content
- connecting product data
- updating routing and navigation
- customizing the UI for the storefront
The original implementation used multiple reusable blocks across the homepage, including hero sections, categories, product listings, testimonials, newsletter sections, and footer layouts.
7. Creating Product Listing Pages
After the homepage was completed, the next step was building the shop page using reusable storefront blocks.
Instead of manually creating the product grid and filtering layout, we prompted the AI agent to generate the page using Shadcn Space blocks.
Example prompt:
Create an ecommerce shop page using Shadcn Space blocks with category filters and product listingsUsing MCP, the AI searched the registry, installed the required blocks, and connected them with the centralized product data automatically.
The original storefront used reusable product listing and catalog blocks for the shop experience.
8. Building Product Detail Pages
For product detail pages, we followed the same AI-assisted workflow.
Example prompt:
Create a modern ecommerce product detail page using Shadcn Space with product gallery, pricing, product info, and related productsThe AI discovered the required storefront blocks through MCP, installed them into the project, and integrated them with dynamic product data and routing.
The original implementation used immersive product overview layouts for the product detail experience.
9. Adding Category Filters
To improve product browsing, category-based filtering was added to the storefront.
The project used URL search params so category selections could update the shop page dynamically.
The original implementation specifically connected homepage category cards with filtered shop page navigation using useSearchParams.
This made navigation between collections feel much smoother without requiring separate hardcoded pages for every category.
10. Creating Authentication Pages
Authentication pages were also generated using reusable storefront blocks.
Example prompt:
Create modern ecommerce login and register pages using Shadcn Space authentication blocksUsing MCP, the AI installed the required authentication sections and integrated them into the storefront layout.
The original project used reusable login and registration blocks for the authentication flow.
11. Adding Testimonials, FAQ, and Contact Sections
To complete the storefront, additional trust and informational sections were added using reusable blocks.
This included:
- testimonials
- FAQs
- about sections
- contact sections
- newsletter sections
The original storefront used multiple reusable marketing and social proof blocks across these sections.
Using reusable storefront sections helped keep the design system visually consistent across the entire website.
12. Final Customization and UI Refinement
Once all major storefront sections were integrated, the final step was customizing the UI and refining the overall experience.
Although the reusable blocks handled most of the structure, the project still required customization to make the storefront feel unique instead of looking like a default template.
This included:
- replacing placeholder assets
- updating typography and spacing
- refining layouts
- customizing colors and branding
- improving mobile responsiveness
- polishing interactions and animations
The original workflow also used AI-assisted asset generation and interactive frontend behavior to improve the overall storefront experience.
Framer Motion was used for lightweight transitions, hover interactions, and smoother UI feedback across product cards, navigation, and storefront sections.
At this stage, the focus shifted from assembling blocks to improving the actual shopping experience and making the storefront feel production-ready.
Real Code Examples
Throughout the project, reusable storefront blocks were connected with centralized product data, routing, and filtering logic.
Here are a few simplified examples from the workflow.
Product Data Structure
// lib/data.ts

export const products = [
{
  id: "1",
  name: "Minimal Linen Shirt",
  category: "Shirts",
  price: 48,
  slug: "minimal-linen-shirt",
  image: "/products/shirt-1.jpg",
},
]
Dynamic Product Routing
<Link href={`/products/${product.slug}`}>
View Product
</Link>
Category Filtering with Search Params
const searchParams = useSearchParams()
const category = searchParams.get("category")
Installing Storefront Blocks
npx shadcn@latest add @shadcn-space/product-listing-01Full Source Code
You can explore the complete project structure, storefront blocks, routing, filtering, and implementation details in the full repository.
This is especially useful if you want to study how the blocks were customized and connected throughout the storefront.
Common Mistakes to Avoid
One common mistake when using reusable storefront blocks is treating them like finished templates.
The blocks provide a strong starting point, but the storefront still needs proper customization, structured product data, and clean routing to feel production-ready.
Another mistake is hardcoding product information directly inside components. Keeping products inside a centralized data layer makes filtering, collections, and dynamic product pages much easier to manage later.
It is also important not to overload the storefront with animations. Small interactions and transitions improve the experience, but excessive motion can make browsing feel distracting.
When working with AI-assisted workflows, developers should avoid relying entirely on generated code without reviewing the structure. AI works best when it helps speed up repetitive implementation work while the developer still controls architecture and overall user experience.
Finally, avoid building large page files with mixed logic, UI, and data handling. Keeping the project modular becomes much more important as the storefront grows.
Performance and Scalability Tips
Even when using reusable storefront blocks, performance and project structure still matter as the e-commerce website grows.
One important decision was keeping product data separated from the UI layer. This made it easier to scale collections, filters, and product pages without rewriting components repeatedly.
Reusable blocks were also customized carefully, instead of adding unnecessary nested components or duplicate layouts. Keeping the component structure clean helped reduce frontend complexity as more pages were added.
For images and storefront assets, optimization is especially important in e-commerce projects because product-heavy pages can become large very quickly. Using optimized assets and lazy-loaded sections helps maintain smoother page performance.
Animations were also kept lightweight. Framer Motion was mainly used for transitions, hover interactions, and small UI feedback instead of large animation-heavy experiences.
Another useful practice was keeping storefront sections modular. Instead of building massive page files, reusable sections were separated into components and blocks, making the project easier to maintain and extend later.
Final Thoughts
The biggest takeaway from this project is that modern e-commerce development does not need to start from scratch anymore.
Most storefronts share the same frontend structure: navigation, hero sections, collections, product grids, filters, product pages, authentication, testimonials, and support sections. The real challenge is not building these layouts once, but rebuilding and maintaining them across every project.
This workflow solved that by combining:
- Shadcn UI for the component foundation
- Shadcn Space for reusable storefront blocks
- MCP for direct block discovery inside the editor
- Antigravity + Gemini Pro for faster implementation
Instead of spending most of the development time creating repetitive UI, the focus shifted toward:
- structuring product data properly
- building scalable routing
- improving storefront UX
- customizing the brand experience
- refining interactions and performance
One of the most useful parts of this workflow was how AI interacted with real project context through MCP. Rather than generating random UI from prompts, the AI could discover actual storefront blocks, install them, and integrate them directly into the project.
For developers, this creates a much more practical workflow:
- Define the section you want
- Let the AI discover the correct storefront blocks
- Install and integrate them
- Connect them with your data layer
- Customize the experience around your product and brand
The important part is that the result remains fully customizable because everything lives inside your own codebase.
If you are building e-commerce projects with React and Next.js, this approach can significantly reduce repetitive frontend work while keeping the project scalable and developer-friendly.
